Showing posts with label 10mm. Show all posts

Monday, May 3, 2010

Blitzkrieg Commander 2 Arrives

Well after what felt like forever (no thanks to you Eyjafjallajökull) the postman finally delivered Blitzkrieg Commander II.  I haven't had a chance yet to read the rules thoroughly so I can only give some first impressions here.

The first thing that is very apparent is that the production quality here is fantastic.  The cover is nice shiny cardstock that almost resembles plastic.  The pages of the books themselves have a nice sheen and there are full colour photos on almost every page of the rules.  The book weighs in at 140 pages (compared to 120 in the first edition) with the rules taking up 40 or so pages before the book launches into the army lists.  One of the greatest strengths of these rules has been that the rulebook has all the army lists you could need, no supplements required.  Well the second edition has only improved on this, extra army lists have been added and most have been added to.  The German North West Europe list for example have been increased from a page and a half of stats to two and a quarter.

Here's a shot showing the breakdown of book between rules and army lists.


As well as being added to and expanded the army lists themselves have gone though some changes:
  • The singular Attack Value has now been replaced with three values: anti tank (AT), anti personnel (AP) and close assault (CA).
  • The standard infantry unit has been replaced with the various unit types found in the conflict.  The German north west Europe list has: Heer, Constscripts, Waffen-SS, Hinterjugend, Luftwaffe, Fortress Troops and Volkstrurm.  In addition you now have infantry upgrades such as Panzerfaust and Panzerschreck.
  • Artillery now plays a bigger part of the game with a lot more on table units.
  • Sadly the sample battlegroup lists have gone, to make room in the book I guess.  But to aid in creating your battleforce, each army list has it's own specific battlegroup selection rules, often citing specific units (eg Max nine Pzklfw III panzer units per 1000 points).
I'll post more once I've had a better read through the rules and preferably had a chance to get them into action on the table.

Sunday, May 2, 2010

Warmaster - Empire vs Undead


Mick came over tonight and we managed to almost finish a game of Warmaster.  We're still discovering how to use each of the units effectively but this time I think we got the mechanics right for the most part.  There were a few occasions where we got ahead of ourselves and missed a phase but I'm pretty sure that with a good quick reference sheet we'll get those issues sorted.

We swapped forces this time with Mick playing the Undead and I the Empire.  Things started badly for the Empire with the Undead charging their cavalry into the flanks of my forces and scattering some knights, crossbowmen and flagellants.  Quite reminiscent of last time when Mick rode two units of knights through the heart of my army.  By turn three we had out massed lines of infantry and archers lined up in the middle of the table when we realised that all the skirmishes on the flanks had met the 7 unit break point of my army.

Three things became apparent from the game:
  1. It is a heck of a lot of fun and flows really well know that we're starting to get the system worked out.
  2. I need to finish painting the minis, especially the Empire commander who managed to successfully order a hellblaster, two cannons and a unit of pistoleers to wheel about and lay waste to an oncoming horde of undead.
  3. I really need a green table mat.
I'm so impressed with how the 10mm stuff looks on the table.  My kitchen table isn't that big and by game table standards it's probably too small for Warhammer but in 10mm it was just right.  With a green mat, some fantasy period buildings and fully painted armies the table will just look fantastic.

Anyway I'm off to the Pendraken website, I need to order some Halflings to base up as Empire skirmishers.

Sunday, April 25, 2010

10mm Buildings - Part 2

I had hoped that my latest Pendraken order would have arrived by now, 19 days and counting, so in between my far too infrequent sessions of painting what I do have I've been making more of the MicroTactix cardstock buildings.

Two of the most recent have been some of the more fiddly designs but they look great.  I'm seriously thinking about basing the church on a piece of plasticard and putting some gardens/trees around it.  Maybe even model up a companion piece with headstones and the like.

Here's some shots, I've put in some 10mm minis and a 28mm one for scale reference.

Here's a lower shot to show the height better.


A shot of everything so far.

Enough for a believable built up area, I'll keep making more though.  I'll stop when I either get sick of making them or my shoe box that I'm storing them in fills up, whichever comes first.  I'm so impressed with these that I'll have to print out some fantasy buildings for Warmaster.

Tuesday, April 20, 2010

10mm Buildings

A little while ago I purchased the Battlelands 15mm Normandy Buildings and Ruins produced by Microtactix.  Initially the plan was to scale these up to 30mm and use them for my skirmish games.  This worked, well for the smaller buildings at least.  After a lot of wrangling the church ended up needing close to 10 A4 sheets to create just on it's own!  So these just ended up sitting on my hard drive... until now that is.  Reducing these down to 10mm I found that they fitted 2 original sheets perfect on a single A4 sheet of paper.  So after an afternoon of shrinking, cropping and rotating these pdf's I printed out around 20 sheets with anywhere from two to four buildings per sheet, more than I should need for any reasonable north west Europe scenario.

Gathering all the tools I needed I headed outside:
  • PDF printouts
  • Cardstock
  • Gluesticks
  • Spray Adhesive

Gluing the paper to the cardstock is simple enough, spray the back of your printout and the cardstock with spray adhesive, wait 10-15 seconds and then join the two sticky surfaces.  Most adhesives will still work if you only spray one surface but the bond won't be as strong.

Once all pages have been glued together I stacked them all up and piled as many big heavy books as I could find on them.  Glues differ on cure time so follow what the can says but I prefer to leave them overnight if possible.  What you should end up with is some fairly stiff card that is still fairly easy to cut.


I won't go into the details of how to cut, score, fold and glue a cardstock building as everyone will tell you different things and what works for me may not work for you.  One thing I can say is the first couple buildings you make will take ages and look crap.  The important thing to remember with cardstock buildings is that they're not supposed to look better than real terrain.  They're a cheap, replaceable piece of scenery.  If (when) they get smooshed then you simply sigh and print out another one.

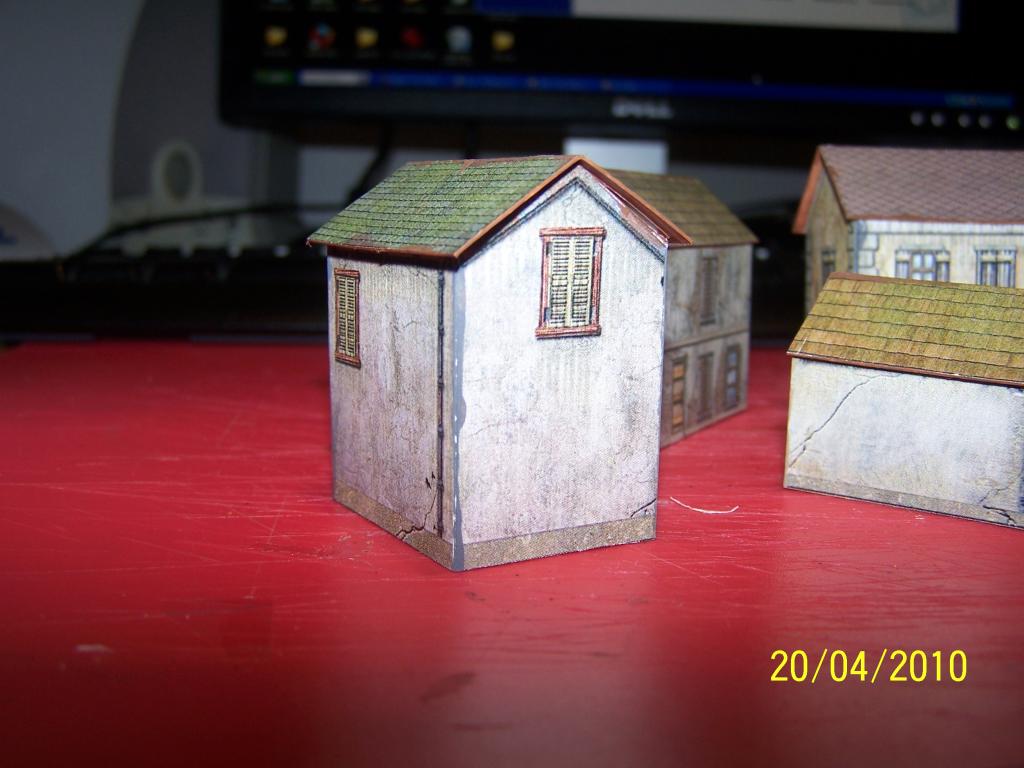
There is one trick to cardstock buildings that makes a huge difference though: edging.  Edging is the process of colouring those white edges you see when you cut out your building.  These really detract from the overall look and they just scream "I'm not real".

When I've cut out my pieces and before I start gluing them together I simply paint the edges with hobby paint.  The colour doesn't need to be perfect and I find darker colours work better at defining the edges than lighter ones do.  There's no real need to be ultra careful here either, any splotches won't get noticed while they're on the table. 

Some edging examples.  The big grey splodge on the left hand side of the building in the second photo below is hardly noticeable on the table, in fact I had to point it out to someone while playing Blitzkrieg Commander.

Edging can take some time, especially on multipart buildings but it is worth it. 

Sunday, April 18, 2010

Cowboys and Panzers

Managed to get in a game of both Blitzkrieg Commander and Gutshot at the club last night.  Mick and I started out with Blitzkrieg Commander and we played a fairly straight forward 1,000pt all out battle, mainly because we wanted to blow the cobwebs off the rules and see how the 10mm stuff fared on the table.

Unfortunately almost all of the photos I took last night turned out rubbish as I'd forgotten to switch the macro mode off and in turn all the long range table shots come out... well rubbish.  We both forgot to bring a green game mat so we had to play using my western one so north west Europe looks a little dry in the photos but the rest of the terrain and the minis (the painted ones at least) looked fantastic on the table.


Blitzkrieg Commander (1st edition) was a blast to play.  It's close enough to Warmaster that I don't have to unlearn any of the rules from that game and the extra WW2 stuff fits into the system nicely.  Sadly the Brits, played by myself didn't start out too well against the Germans who were superbly commanded by Mick.  I handed over command to James in turn two who managed to fare better than I did but was still unable to turn the tide.  Well we've got the main mechanics down now and I feel more comfortable that next time we can manage a bigger game.  The German reinforcements will hopefully have arrived by then and I think I'll have to base the Aussies up for use until I can get some more British.

I was too busy painting WW2 stuff yesterday and forgot to quickly reread the Gutshot rulebook, so play was a little slow to start with but move along quick enough, with most players not needing to refer to the rulebook by the end of the game.  We played the Last Man Standing scenario with two characters apiece.  Each player started in a respective corner of the table and very soon the gunfight, and knife fights, began.

Game play is fast, I like the card activation, and characters seem to take a bit of a beating without being bullet sponges.  The game play feels very Battletech-ish in the way the system handles combat modifiers for movement and damage with progressive negative modifiers to movement and accuracy is also very familiar.  This is not a bad thing though.  The game is simple and play is fast, it would get boring if all you played was shootouts week in week out but scenarios run by a referee are where this game shines.  I think I'll bring this may just become our choice of "quick game at the end of the night".

I'm happy too with the cardstock buildings, they've suffered in storage but I can fix that with a little balsa wood and glue.

Cards:  the card activation for Gutshot works a treat but the rulebook does recommend using name slips in a hat of something similar.  I went with cards and just assigned a number to each character.  This worked but slowed things down a little.  I think I'll get hold of some poker chips we'll use those in future.  A white sticker on one side with the characters name in pencil should do fine.  Also removing dead guys from the deck helps and it quickly got to the point of turning four or five cards before we got to a live fella.

My two characters below, Blackie and Ol' Gray, named after their hats of course.  Ol' Gray managed take take two hits from a revolver, got spat on and cursed at (twice), got stabbed in the back with a bowie knife before being shot for the final time  Blackie didn't last much longer but he did manage to take down the gringo that snuffed out Ol' Gray.


I had a few people asking about where to get miniatures from so I think things look bright for Gutshot.  Now all I need to do is find a Marty and Doc mini, I've got an idea for a "Mad Dog Mcree" scenario.

Friday, April 16, 2010

Terrain: 10mm Woods

With my hedges almost done (just waiting for them to dry) I thought I'd turn my attention to the trees I need to base.  While these trees are N scale the process is pretty much the same as what I did for my 28mm trees, I just used bigger bases (50-60mm MDF) and used a bit of modelling putty to help fix them to the bases.

The process is simple enough, just drill a hole where you want a tree.  You want the drill bit to be a little smaller than the trunk width, if its too big then you will find it fiddly when gluing the tress.

I went for a mixture of two tree and three trees per base.  I found that putting the tree closer to the edge of the base so that the limbs overhang looks best.  It helps hide the base and allows you to bunch up trees to represent thick or heavy woods.

Since the trees were the same height (all 100 of them) I trimmed a little bit off the stem/trunk of each tree before pushing it into the base.  As you can see here the fit is quite snug and probably wouldn't need gluing but I did anyway just make sure, after all these are going to get a bit of handling on the table.  Just a small dab of superglue at the base of the trunk will suffice.


My first few completed stands, even now it's starting to look like a little woods.

As you can see, I forgot about the slotta tab slot.  A bit of paper will do the trick but it was fiddly getting it in there.


So I stopped drilling and glued over the slot on the remaining bases first.

After all the bases had been drilled and trees glued into place I painted all the bases dark green (from memory GW Salamander Green methinks).

Almost done and looking good, just a bit of flock and they'll look even better.  So out comes the flock and my trusty tub of "watery glue sludge".

And then I'm left with this:

Just a few shots of the trees in action.  I'm really happy with these, and best of all is that it only took around two hours from start to finish.  I'll be getting some more of these for sure, you can never have too many trees on the table.

Wednesday, April 14, 2010

Terrain: 10mm Hedges

Only having finished making some hedges for my 28mm WW2 minis I realised I'll need some for my 10mm minis too... *sigh*.  Well the having learnt a thing or two through making the big stuff I set myself some goals with these ones:
  1. They have to be quick to make.  I'll lose interest otherwise and they'll sit somewhere half finished for months.  My wife will not approve.
  2. They won't need to be basedMaybe, won't know for sure about this but I'll make them without bases and see how they fare on the table.  They'll be dunked in glue/paint, flocked and then sprayed so hopefully they'll have enough weight to sit still on the table.  If not then I'll just buy some 0.5mm/1.0mm plasticard and use that.
  3. I'll need lots of it.  Sadly, in this case at least, 10mm allows for big battles and you can get more of it on a 6x4 table so in turn you need a lot more terrain.  Besides, you've seen photos of Western Europe right?  Hedges, hedgerows and bocage everywhere.
Step One
Grey or dark grey foam is an absolute must as starting point.  I won't have to paint it and if any does show through, and it will, then it will be darker than the flock and add a little depth.

I cut strips and used a knife to rough up the surface a little, pick away at it too making sure to get rid of any straight edges and flat surfaces.  I wasn't being too careful here.

While doing this make sure that the hedges aren't bigger than the container you have your flock in.  I didn't do this with the 28mm stuff and it was a massive hassle.

Step Two
Add water, white glue/hobby glue/mdf glue (anything water soluble) and paint.  I used as sponge dabber brush (?)  to mix up as it makes it easier to get stuff off the bottom of the container if it settled.

Step 3
Make sure your storage tray is right next to the dipping and flocking trays... I learnt this the hard way.

The finished hedge, maybe 15min from start to finish and I'm really happy with the end result.  Now I just have to make more... a lot more.

Tuesday, April 13, 2010

Painting the Pendraken: Day Six (and a few)

I've been slowly working away on the Pendraken minis, and with the long awaited plasticard arriving yesterday I got to work on basing the remainder of the minis.  I should have enough bases left over to cover the extra German stuff, hopefully arriving sometime before Saturday.


Basing the HQ and CO stands proved to take a little longer than I had thought it would.  You're basically building a little diorama so I had to keep my grand ideas in check and keep the base functional and quick to build/paint.

My first attempt at 10mm miniature hacks.  The passenger has had his head removed and replaced with a commander torso (clipped off at the waist and glued to the neck of the passenger).  The radio operator has been removed from his base, he was originally kneeling on the ground, and repositioned to sit on the seat.  You can't really tell from the photos but the radio operator is missing his left leg.  I had clipped it off and was in the process of gluing it on when after dropping it on the floor for the third &%^%$-ing time I decided to just glue him in as is.

My favorite CO stand has two German officers "discussing" which way to go.  I'll model this base as a crossroads with the road sign knocked over or missing.

I'm on the home stretch now with most of the miniatures having varying degrees of paintwork and almost everything based.  I'm hoping to get all painting and basing done by Wednesday night.  This give me Thursday and Friday to put together some cardstock buildings and base up the trees.  Hedgerows may be possible, I'll glue some flock to the dark grey foam I have and see how that comes up.

More photos to come as I get stuff finished.