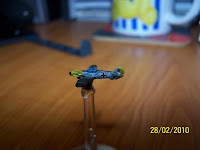
I thought I'd have a go at putting the tail markings on some of the 109's and take a few photos of the process while I was at it. I don't claim this to be the "right" way to apply decals, it's just the way that works for me.
First up the tools required: a saucer of water, pretty obvious I know but the colour of the saucer is oh so important. You want something that helps the decal stand out. It's not an issue when you're applying a British roundel but you'll thank or curse your colour choice when you're putting on white Balkan crosses.
I usually cut enough decals to do six aircraft. No particular reason it's just a number that works for me.
Trim your decals down as much as you can. What I didn't do here was trim away much of the gap between the decals which made the application a little trickier than it should have been.
Cut them out over the saucer and let them drop it. Leave them there to sit for maybe 30 seconds.
Using the brush slide one of the decals over to the edge of the saucer.
Carefully slide the decal off the paper. I slide the decal about 3/4 of the way off and then slide the brush under the decal and lift it up.
Bad photo sorry but trust me there is a decal on the end of the brush. The idea is to put the brush where you want to aply the decal and let an edge of the decal touch the mini. What should happen is the decal will want to stick to the model and slide off the wet brush.
This is where it got really tricky. If I had trimmed the decal down properly then I would have had heaps of room to position the decal but since I was trying to put a misshapen rectangle onto the tail I had to do quite a bit of shuffling and sliding to get it into a good spot.
On saving grace is at 1/600 scale it doesn't matter if a decal isn't exactly in the right spot. If it looks like it's in the right spot then it is in the right spot.
The finished product. I don't know if the tail markings do much for the miniature when it's on the table but it does add to the oh wow factor when looked at up close.
So now onto my next fiddly project: propellers.


thanks for the tutorial Timbo, most appreciated. Looking forward to getting mine into action!
ReplyDeletenice one timbo.. 1/600 ecals is one bit im dreading with my eyesight!
ReplyDeleteby the way I reckon we three should form a Victorian BTH/ALGY group..
ReplyDeletemay I suggest a name "3Sqn BTH"
http://www.airforce.gov.au/RAAFMuseum/research/units/3sqn.htm
http://en.wikipedia.org/wiki/No._3_Squadron_RAAF
http://www.awm.gov.au/units/unit_11023second_world_war.asp
3Sqn was formed at point cook and did just about everything, it seems!
a 3 sqn mini campaign might be a fu thing to o perhaps they really got about!
ReplyDeletewoo!
ReplyDeletehttp://www.3squadron.org.au/